One of those days
Posted in on by
This morning/day was just one of those days. I was running behind because I couldn't find my keys (shocking), but let me back up. Somewhere between putting my "coat" ( for those of you that know me well coat is a loose term) on getting my breakfast and coffee ready I picked my Keys up and put them in my pocket. Fast forward to me frantically and angrily digging through my purse, getting extremely frustrated, I for some reason slipped my hand in my pocket and screamed "they're right here I have them" and flying out the door - later than I wanted but still on time for work. Go to open my door...frozen shut, as are the three other doors on my car. Finally get the passenger side back door open can't get passenger front open...can't get any door open. So in the freezing cold I'm blow drying BLOW DRYING the seal of my car hoping it would open, after a good 5-7 minutes of this, it finally does! With a frozen muffin and cold coffee I was off to work...and only 20 minutes late. Gotta love michigan! :)
Whoa!!!
Posted in on by
So I know that my car isn't really "buried in" but having the plow fly by numerous times today and the huge amounts of snow we got was fun! Luckily it was all "dust", my low rider swerved a little, but all good! My bigger annoyance are the people who, on a one way street clearly see you wiping your car off, and no one in the lane next to them REFUSE to get over! Drives me batty! Ok, end rant! Anyways, the decent amount of accumulation (the second pic is of my door when opened and nothing wiped off) has made it even more beautiful! My dog loves the snow she runs throw like it's a pool of water!


You know you live in Michigan when
Posted in on by
This lake effect snow is not messing around! It can go from clear to NO visibility in .01 seconds, not complaining...actually loving!
Anyways, you know you live in Michigan when at a stop light your window is done and you are grabbing your wiper blade to drop against your windshield because the ice has built up from five minutes ago when you were wiping your car off!!
Happy happy happy! (Name that show...if you can't you need to watch! :))
Posted in
amazon,
cooking,
ebook
on
by

Slow Cooker 101 - this gem is FREE at Amazon today (Originally 19.95) for the Kindle. Best thing with that is you don't have to physically own a kindle to get this, if you have a computer, smart phone, iPad, tablet, download the Kindle app and you are able to read this on there! During these cold days, all of us want nothing more than a nice warm meal, and a slow cooker is a great way to do that! I can't wait to dive into this! (Click the picture to go directly to the site to purchase this!)
Photo credit www.amazon.com
My attempt at making Gnocchi
Posted in on by
Not only is this about my attempt (and success) at making Gnocchi. It's also about my attempt at "food blogging", and how far I have to go. I get so excited about making a new recipe, that I forget to stop and take pictures along the way. I will get there, and if have to re-create what I can! Anyways. Thanks to my good friend Holly for recommending smittenkitchen.com I am now obsessed with reading her blog. Side note, Holly was telling me about how she made gnocchi from the smitten kitchen cookbook and if I had a few extra dollars it would definitely be worth buying. Well, I enjoy LOVE cookbooks (something my mom has passed down on to me), and I have been wanting to try gnocchi. I didn't have the few extra dollars right then, so I went and moseyed over to smitten kitchen's blog and lo and behold what do I find, her recipe, that's in her book, for gnocchi! WIN! I get the recipe, and it didn't cost me the few extra dollars! (even though I do still plan on getting the book!) Ok, back to my experience...
Like I said I'm still working on my skills as a food blogger. The original recipe called for these to "float" in a tomato broth. It didn't sound like something that I would love, and I asked Holly what she thought of it, and said it wasn't her favorite, so I decided to pass. Instead I just made a pan roasted tomato "sauce".
Start with 2lb of potatoes - about 3-4. Bake them in a 400 degree oven for about 45 minutes - 1 hour, until a thin knife can easily pierce them!
While the potatoes are baking, get a skillet, sweat 2 cloves of minced garlic - mine "toasted" - in 2-3 tablespoons of olive oil.


Once the tomatoes were nice and soft, I added 1 tablespoon of Balsamic vinegar, but about 1/2-3/4 tablespoon of brown sugar for a little sweetness. The tomatoes will start to reduce and thicken, you will think that it looks like tomato juice, but cooking this on low for well over an hour will cause a wonderful sauce. Just give it a stir every once in a while! Also, because I love garlic, on top of the two cloves I minced beforehand, I smashed two more cloves and threw them in for flavor!
After an episode of Duck Dynasty, (don't judge me, it's a clean show, that's ridiculously funny, Jack) my potatoes were ready. I used four, but after I had peeled one of the potatoes I realized that I didn't have a picture of them yet (oh the travesty)!


Like I said I'm still working on my skills as a food blogger. The original recipe called for these to "float" in a tomato broth. It didn't sound like something that I would love, and I asked Holly what she thought of it, and said it wasn't her favorite, so I decided to pass. Instead I just made a pan roasted tomato "sauce".
Start with 2lb of potatoes - about 3-4. Bake them in a 400 degree oven for about 45 minutes - 1 hour, until a thin knife can easily pierce them!
While the potatoes are baking, get a skillet, sweat 2 cloves of minced garlic - mine "toasted" - in 2-3 tablespoons of olive oil.
Once the garlic has sweated, I quartered 1lb of Campari tomatoes - pre-salted - because tomatoes need salt, and placed them in the skillet. Turned the heat to low and let them reduce. I added some dried basil leaves, italian seasoning, s&p.
After an episode of Duck Dynasty, (don't judge me, it's a clean show, that's ridiculously funny, Jack) my potatoes were ready. I used four, but after I had peeled one of the potatoes I realized that I didn't have a picture of them yet (oh the travesty)!
To avoid burning your fingers, not saying I did..., make sure you let them cool - the recipe says about 10 minutes, maybe a few more. Once they are peeled - let them cool another 10 minutes, again maybe a few more.
(and look at that I have a picture of all 4 peeled potatoes!)
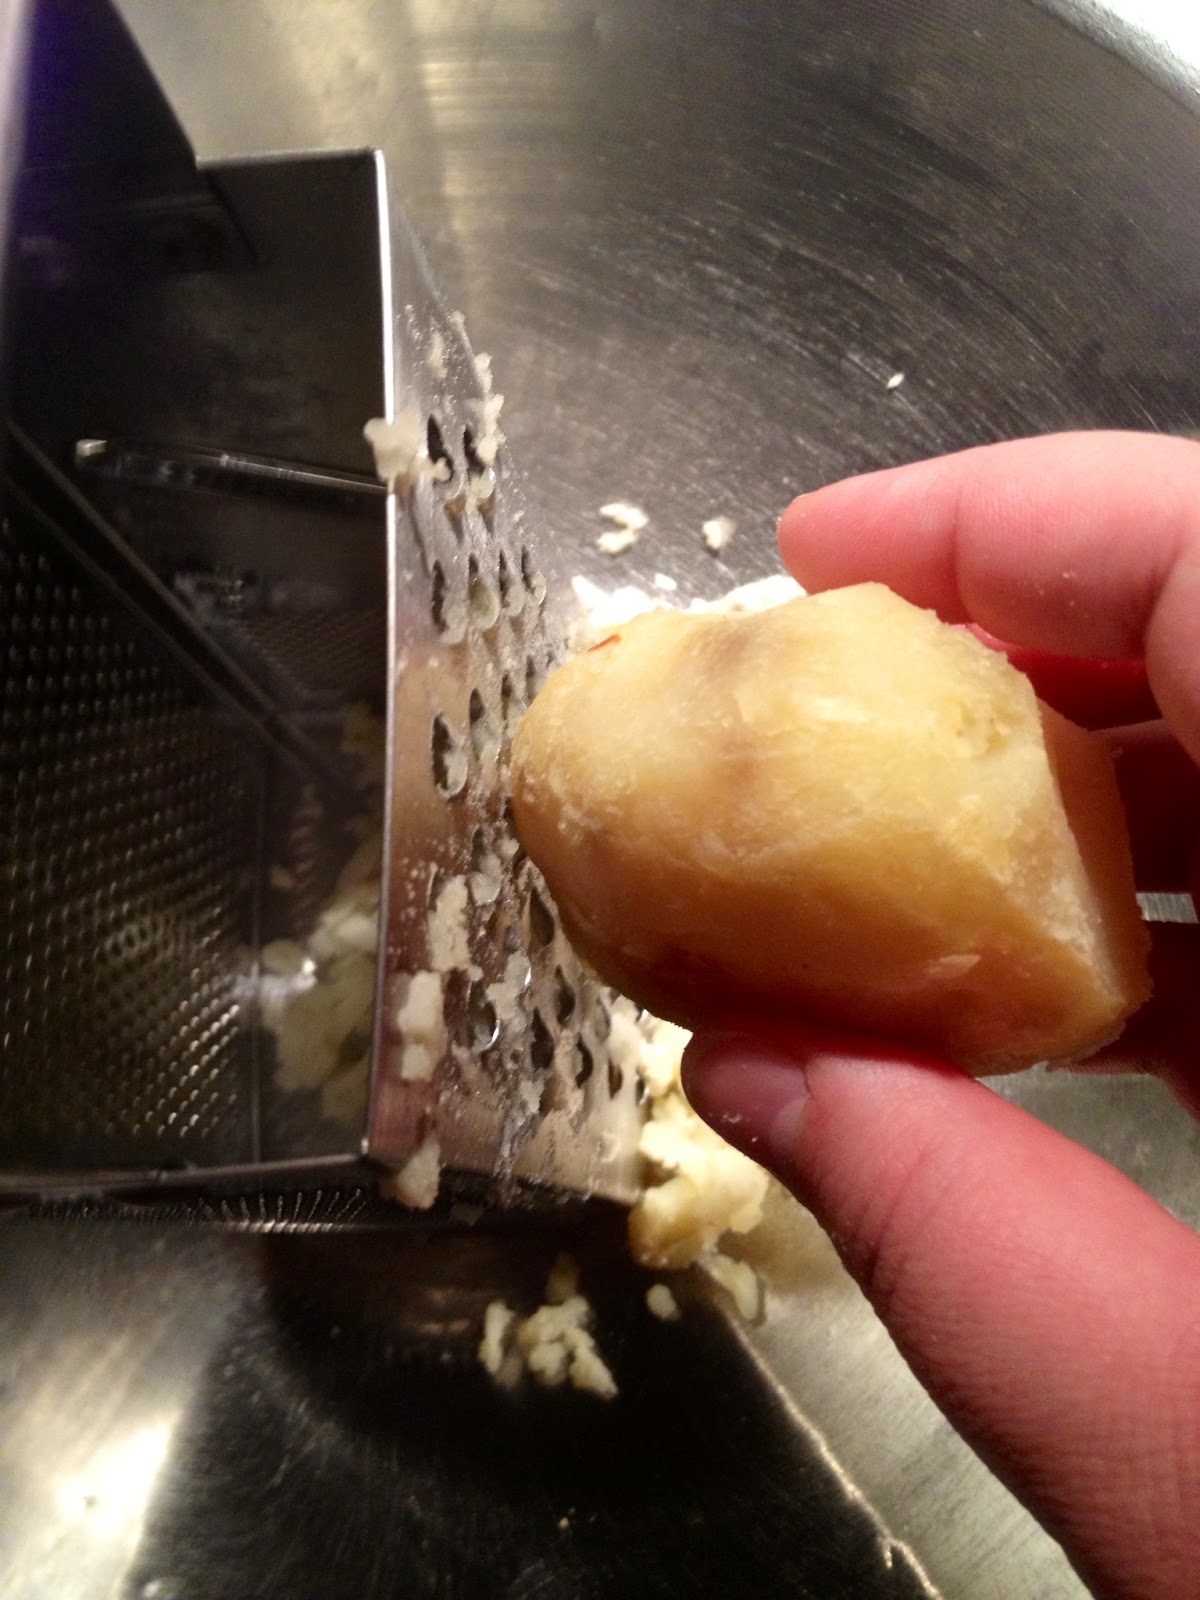
Now, if you own one of those fancy schmancy potato ricer - get it out, mark it down on your calendar - it's your once a year use! Or, for most people using the good ole $5 box grater works just as well. Use the large holes. Grate the potatoes into a bowl.
They will start to fall apart, which is expected to happen with a grater that's fine, I ended up placing the potato in the palm of my hand and just ran my hand over the grater, trying to get as much of the potato grated. Turned out pretty decent I'd have to say.
To the potatoes please add (because if you don't there will be major consequences) 1 large egg, and 1 tsp. table salt. I'm pretty well known for NOT using my measuring spoons. Palms work just as great for that!
Mix the two together, until combined and getting something that resembles mashed potatoes...wait, mixing baked, grated, potatoes together, is pretty much mashing.....nevermind.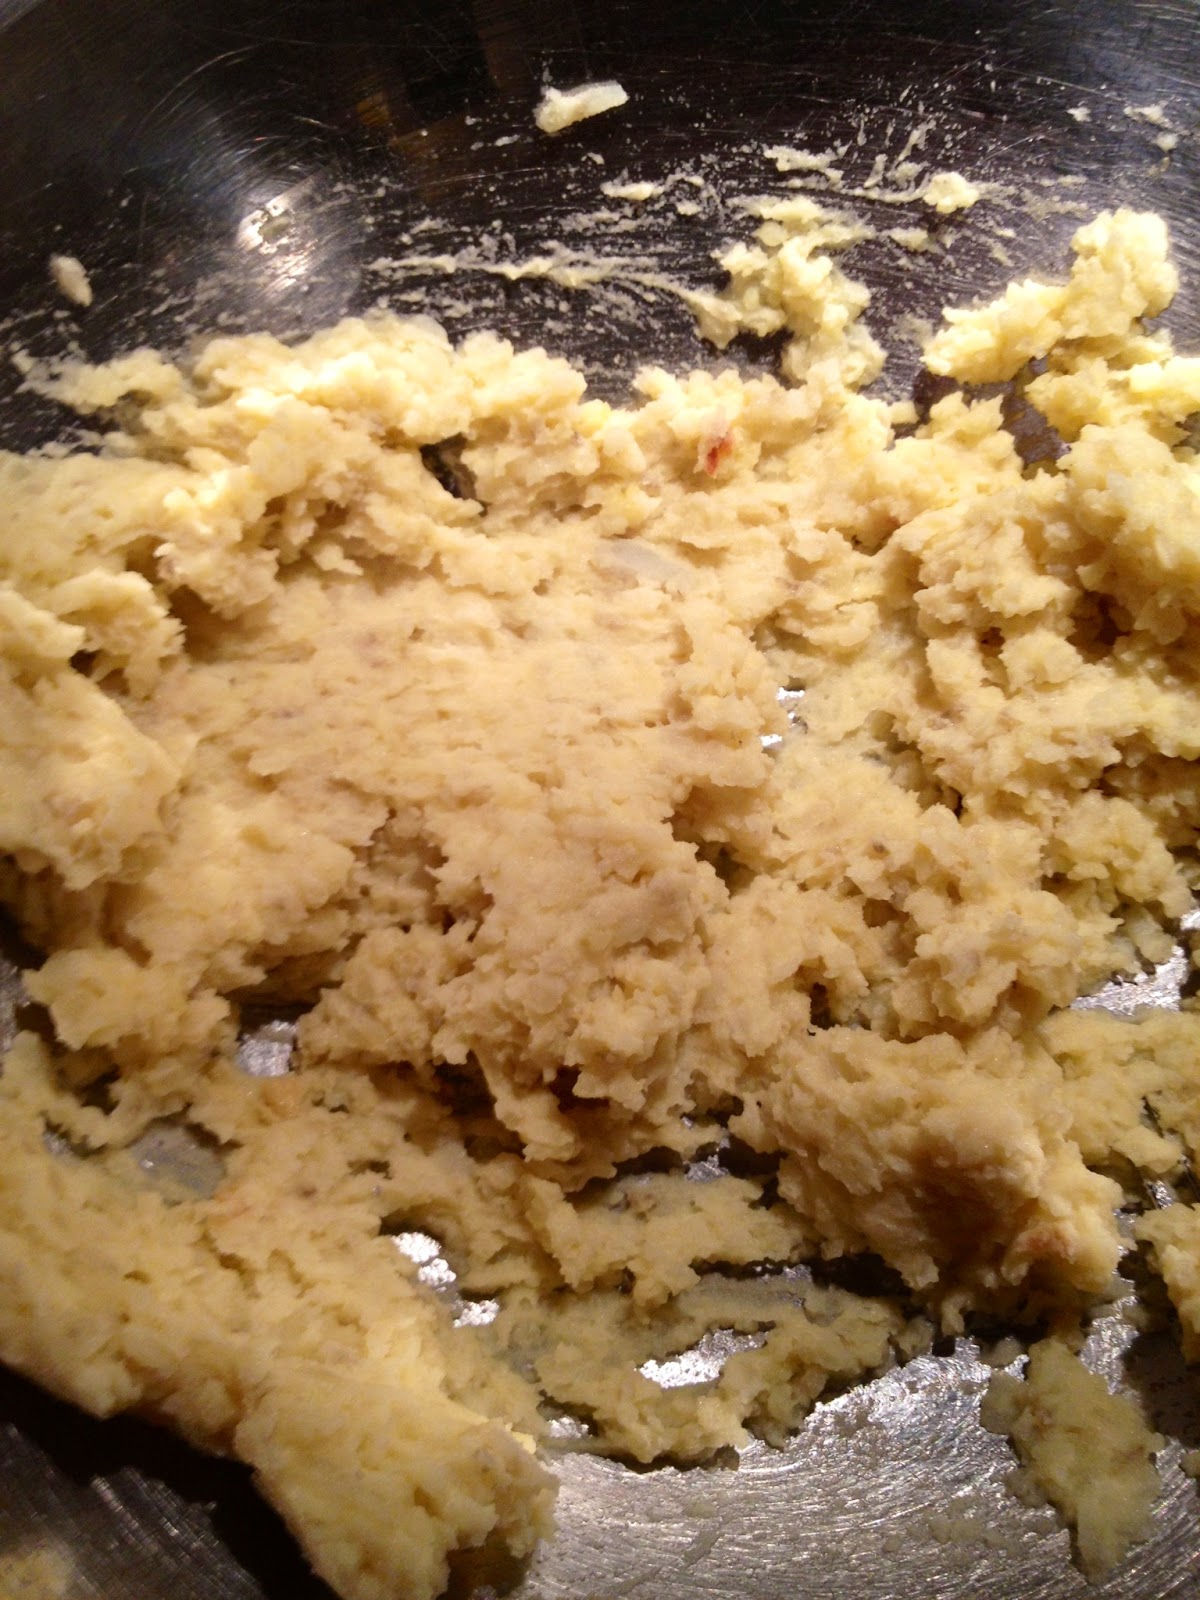
Here's the part that made me question whether or not I had two lbs of potatoes. The recipe calls for 1 1/4- 1 1/2 cups of flour, but you just don't add 1 1/4 and then see if you need more. You are supposed to 1/2c.
Mix, then add 1/2 c., mixing again, and then add 1/4 cup and then see if this is enough to form a dough that does not stick to your hands. Honestly I thought that I had enough after the first 1/2 cup of flour. But knew that couldn't be right, so I added the 2nd 1/2 cup and didn't add anymore. I figured that the amount that it would be rolled out on the counter and make sure it was not sticking would be enough!
Knead it for a little bit to form a dough, then divide the dough into quarters. See pic below, in case you don't know what quarters are...:) And remember this, never assume the obvious!
So the next part was not as easy as I thought it would be, it wasn't terribly hard, just had to find my niche. Take one of the sections and roll it out into a long rope, about 3/4 in thick (I would probably make my less thick next time, and make sure it is more even - for a first time I was impressed)
Then take a nice sharp knife and cut the rope into 3/4 inch pieces. Make a rope out of all 4 of the sections until you have something that looks like this:
Tip: Make sure that the thickness of your rope is as even as you can make it, and that the pieces are all about the same size. This will really help to make sure that everything is cooked evenly. I found that when rolling the rope out, use the palms of your hand and then also start from the middle and work out. I'm sure that next time I do it, I will find something else that works, but for know that's the best I found!
Shoot, I hope that you are reading through this first and then making it, and not reading/making for the first time together, because you needed to have a pot with well salted water boiling. If you don't, no big deal, just crank the heat and salt well! Once the water is boiling drop some the pieces in the water until they float - about 2 mins - drain them once floating. DON'T dump your whole kettle of water out when draining, use a slotted spoon, because you have to cook the rest of them. I did about 1 ropes length at a time, I could have done more, but I rolled out each section while one was cooking.
Almost floating!
So, because I think that I'm a chef extraordinaire human, I do stupid things. I had been reading one of the many other blogs that frequent and saw that she had made toasted gnocchi with pesto (let it be know that's my next trial and error!) I didn't think that I should put the pieces in a pan without cooking them first. wrong. I tried to put them in a pan with some EVOO, to toasted after I had boiled them, they just ended up sticking to the pan (I didn't think of the starch content) even with oil. Unfortunately, I had to throw them away, but you will see with the pan below that there are parts that I had to scrape out and didn't get them all!
So back to this idea of toasting them. I thought that would be a great way to eat these. I love to have crunch to my food, so after I screwed up the already cooked ones. I put more EVOO in a pan, and put a handful of uncooked gnocchi in there with some salt and pepper and cooked them until they were brown on each side, about 5-6 minutes. Next time I will add a few more minutes.
This was a great idea until I realized that my sauce that I wanted to reduce, well it did just that, reduced to almost nothing! Here comes "what would be the best way to fix this without quickly cooking down some more tomatoes and not having access to any broth"
So, since I didn't really want to eat tomato skin I thought ok what can I do strain the sauce from the skin. I tried using a paper towel and squeezing the liquid out with hopes that all I would have left was the tomato skin. Note, if was at home I would have used my food processor and just processed it all together to get a sauce. Then I thought well I will get a strainer and strain it through there. Well that worked but, but I was left with was about 1/4 cup of sauce, not enough to coat anything.
I put the gnocchi in the pan to mix it all together and kind of re-heat it, because after my trial and errors they had cooled to room temp, and I wanted a nice hot dish!
After my trial and error I ended up dumping everything back in the pan and mixing it up and have it that way!
I wanted to have the toasted gnocchi in its own dish to try, but because of my lack of sauce they all were mixed in together. I'm not a saucy person (pun intended) and so it actually worked out that there wasn't a ton of sauce. I'm sure that if I had a food processor to run everything through and fresh parm it would have been perfect! But this is what I ended up with
For my first time I was very pleased with will be looking for more recipes that I put gnocchi in!
Oh I almost forgot, since I was only making the dish for me, I flash froze about half of them and have a batch that is waiting to be used. Just place them in the freezer on wax or parchment paper on a plate or pan and once they are frozen place them in a freezer bag to be used when you want! And you don't have to thaw them before cooking them in water, just place them in the boiling water or pan to toast and it will just take a few minutes longer to cook!
Click here for the recipe of this awesome potato dumpling like substance, trust me you won't regret it!
One of my next recipes is one for Sugar Biscuits! Can't wait for that one! Plus, I just love Pioneer Woman!
Monday morning...
Posted in on by
#wokeupearly #breakfast #donutshopcoffee #bestmealoftheday #warmcar #bestdad #blakesheltonhoneybee #happymonday


Gnocchi (sneak)...
Posted in carbs, from scratch, gnocchi, Smitten kitchen on by
...it's what's for dinner!!
Here's a little sneak of my dinner tonight. I'm going to put the whole process up when I have an actual computer to layout the pictures! Until then just know that this was super yummy and super easy (4 cloves of garlic, balsamic vinegar, olive oil, potatoes, parm :))


Here's a little sneak of my dinner tonight. I'm going to put the whole process up when I have an actual computer to layout the pictures! Until then just know that this was super yummy and super easy (4 cloves of garlic, balsamic vinegar, olive oil, potatoes, parm :))
Happy Friday!
Posted in on by
I knew the sunset was going to be gorgeous tonight, but just didn't know how gorgeous! I wanted to get down around the lake, but didn't have time! The open field on Roosevelt Park will have to do!
So grateful for the weekend! House/dog sitting this weekend!
Dinner with my brother and uncle tonight!
And the best part of it all, the weekend gets to come (and go) as it wants!
Happy Friday!!

So grateful for the weekend! House/dog sitting this weekend!
Dinner with my brother and uncle tonight!
And the best part of it all, the weekend gets to come (and go) as it wants!
Happy Friday!!
Blessings!
Posted in on by
Tonight, I was able to spend good quality time with a girl friend that The Lord knew I needed in my life! He was spot on when we became friends. (Even talked about that tonight! ;) We have known each other for less than 2 years, but it has seemed like our whole lives!! Tonight was no different, laughter, stories, tears, appetizers, chocolate, sharing our hearts. Such a huge support and blessing!
Everyone should have an Angie in their life! :)

Everyone should have an Angie in their life! :)

Beginning and End
Posted in on by
A chilly beginning of my day was greeted with this beautiful sight...


The end of my day was welcomed with these beautiful images.


Mad Tuesday love!
Some days...
Posted in on by
...are just a diet coke, chips 'n dip kind of day! (Oh and of course ice cream!)

Attempting Baklava
Posted in on by
I love to bake and cook! I just don't do it much - it's hard when you don't have your own kitchen, and working full time. Weekends seem to be my favorite time to bake, more time to do it, not being rushed, etc. Well, I love Michael Symon, he is one of - if not, my favorite "celebrity chef". He's hilarious, down to earth, and of Italian/Greek descent, so I figure if I'm going to follow any ones recipe for baklava, his would be a great one for that! It was actually pretty easy, want to know how to do it keep reading (with pictures, although not the greatest because I couldn't find my real camera so it's just my phone, but it's something!)
The line-up of ingredients:


The line-up of ingredients:

Unsalted butter, walnuts, honey, cinnamon, sugar, graham crackers, lemon, phyllo dough, food processor.
First I started with melting 2 sticks of butter (the recipe calls for four, but I wanted to use only what I needed, I ended up using about 2.5 sticks of butter)

While, the butter was melting I brought out my "Merry Christmas to Me" Food Processor! Side note, I have wanted a food processor forever, but didn't need a huge one - I'm sure that eventually I will :). Well I was at Kohls' and Food Network, had exactly what I wanted...and in purple! Even better, I have been watching this and the cheapest I have seen it is 24.99 (Black Friday price) and three weeks later it was on sale for 19.99 and I had a 20 percent off coupon! I was super excited, and LOVE IT! Ok, back to the recipe, I took 8 graham crackers broken into quarters to make 1 cup graham cracker crumbs, you can pre-buy them, but this works just as well.


The recipe calls for 1lb of pistachios and/or walnuts. I didn't want to buy any more nuts, because we had an abundance of them at home, so mine is a walnut/almond mixture, they are to be coarsely ground.

Mix the graham cracker crumbs, and nuts together, add 1/2 tablespoon of cinnamon (I made mine heaping...sorry for the somewhat blurry photo)

Mix that in with the graham cracker/nut mixture, until well mixed! Set that aside. Now comes the fun part, the phyllo dough. It really isn't hard to work with, it just takes patience. Take a 9x13 pan, brush the bottom with butter, place 10 pieces of phyllo dough, buttering each piece before putting another over it.

Then place 1/4 of the nut mixture, place 4 sheets of phyllo dough - again buttering each piece before placing the next one on. Did I mention that this recipe had butter?

After the first nut mixture the pattern should go like this:
nut mixture
4 piece phyllo
nut mixture
4 pieces phyllo
nut mixture
4 pieces phyllo
nut mixture
Then finish it off with 10 more pieces of phyllo dough - again butter on each piece, before the next - hence the 2.5 sticks of melted (imagine if I would have use the whole 4 - just wait until you hear the syrup - I'm pretty sure that I need to be walking the treadmill while making this.)
Once all of the phyllo dough is on - wait for it - top the last layer by pouring generously spreading butter, as if there wasn't enough! Then cut 1.5 inch rows, then 1.5 diagonally - to get diamond shape, diamonds are a girls best friend.


I made sure that mine had plenty of butter, a nice shine to the top!
Well since I didn't tell you until now to preheat your oven to 350 - now would be a great time to preheat - so make yourself a cup of coffee, and pat yourself on the back for getting the labor intensive part done! Once the oven is ready bake for 1 hour or until golden brown.

While baking, here comes the "I contracted diabetes from making this" syrup.
Since I wasn't great at reading recipes I messed up with my lemon juice and put it in the beginning and not at the end, oh well. Normally it would be put in after the mixture comes to a boil.
In a pan mix 1 1/2 cups water, 3 cups of sugar, 6-8 oz honey (I estimated how much out of a 12oz jar)

Bring this to a boil and cook for 10 - 15 minutes.

Once cooked, add 1-2 tablespoons of lemon juice, except I didn't do this because I was the dumb dumb that added it at the beginning - oh well. (I learned that while I was draining some of the syrup off my baklava that I would pour it slower next time, because this makes a lot and will make it a little soggy, just watch it and use your discretion to how much. The more syrup the sweeter the baklava, but also a change of a little soggy baklava too. I don't know about you, but I'm not down with soggy anything.
The outcome - a gorgeous, yummy, treat!

In case you don't want to write the whole recipe down from what I just said, click here for the recipe.
Oh and here's the bad news you have to wait six hours -minimum- to eat this, that's why I recommend making this in the evening, so that you can go to bed and not have to stare at it all day. Of course with every recipe you have to "quality control" it, so I'm giving you permission to try a small corner or two, while it's still warm!
Kali Orexi (Enjoy!)
Subscribe to:
Posts (Atom)